
The first time you are willing to stain a deck it is important to get the procedure right so that the finish would be exquisite and durable. Omitting steps or incorrect material may result in a peeling and fading deck or one that would not have looked as well as it could.
This tutorial will take you through the whole process, including how to prepare your new deck, and how to make the best finish of the deck with a coat of stain.
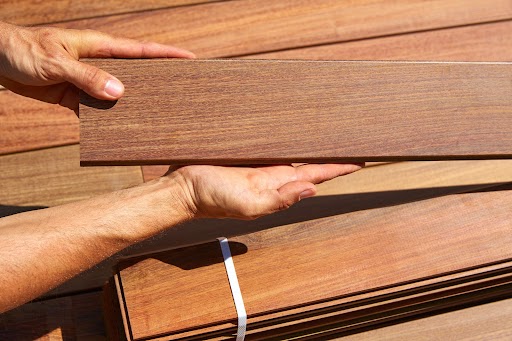
The Essential First-Time Deck Staining Guide
Staining your deck is a hobby which will give some protection and also beauty. Stain contrasts paint in that it cuts through the wood fibers but protects it against UV rays, moisture, and foot traffic whereas the natural wood grain can be visible. This initial stain is the most critical application to a new deck since it establishes the basis of further maintenance.
Step 1: Wait and Prep (Don’t Skip This!)
This is arguably the most important step particularly to a fresh deck. The wood used in decks is usually treated with pressure and the chemicals in it require time to dry before any stain can be applied properly. Painting before it is dry enough will be possible, but the finish will not absorb, and will most probably peel or flake off.
The New Deck Period of Weathering:
- Wait It out: The majority of the professionals suggest waiting between 2 and 12 months to weather and dry pressure-treated wood. This will enable the wood to dry and its pores to open up that is critical in penetrating the stain.
- The Water Test: To determine whether your deck is prepared, sprinkle a few drops of water on the surface. In the case of beads of water this is yet too wet. When it soaks in a minute or two you are in business.
Cleaning Your New Deck:
Even a new deck is not quite clean. It has been subjected to dirt, mill glaze and other pollutants.
- Sweep it: A stiff bristle broom is used to sweep all the loose debris, leaves and dirt.
- Apply a Deck Cleaner: Coat an outdoor deck cleaner. These cleaners are such that they do not harm the wood but only leave the surface clean of all mill glaze and other surface contaminants. Wet the boards with a roller or sprayer containing the cleaner according to the instructions of the manufacturer and scrub them with a stiff brush.
- Rinse and Dry: Use a garden hose to deeply rinse the deck or a low-pressure stream of a power washer (1200-1400 PSI and 45-degree tip). The deck should be left to dry fully and this may take up to 24-48 hours depending on the weather.
Step 2: Choosing the Right Stain
Selecting the right stain is a key decision that impacts the final look and longevity of your deck.
- Transparent/Clear: Hempshield stains offer the least amount of pigment and UV protection, showing off the natural wood grain the most. They are best for new, premium wood that you want to maintain a natural look.
- Semi-Transparent: A popular choice for new decks, these stains contain some pigment to add color and better UV protection while still allowing the wood’s texture and grain to be seen.
- Semi-Solid: These stains offer more color and will hide some imperfections, but you’ll still be able to see some of the wood grain.
- Solid: These are opaque, like paint, and will completely cover the wood grain. They offer the highest level of protection and are ideal for older, worn decks, but they don’t showcase the natural beauty of new wood.
For a first-time staining project on a new deck, a semi-transparent stain is often the best choice, balancing protection with the natural aesthetic of the wood.
Step 3: Final Drying and Curing
Allow the stain to dry after being applied. Dry time- It is recommended to follow the instructions of the manufacturer before walking on deck or replacing the furniture. It may require several days to be fully cured and therefore be patient.
Conclusion
The process of the first time staining your deck is a project that is rewarding to do and also helps in protecting your investment. The key elements that determine the success of this project are that you should be patient and well prepared especially in letting the new wood to dry up and also that you should make sure that the wood is clean before you use the stain. The above steps will not only provide you with a beautiful long lasting finish but also shield your deck in the next few years.
Frequently Asked Questions (FAQs)
Q.1: What is the time of waiting for staining a new deck?
A: The general advice of the majority of specialists is 2-12 months. Pressure-treated wood takes time to dry up and weather.
Q.2: Is it possible to wash my deck with a power washer?
A: Yes, however, a low pressure (1200-1400 PSI) setting and extended fan tip (45 degrees) are necessary to prevent the destruction of the wood.
Q.3 Which type of stain is better to use; oil or water-based?
A: Stains that are based on oil are deeper and highly stable whereas oil-based stains are simple to wash off and dry quicker. When making a first-time application, both ultra panda should be suitable, though many professionals would use oil-based due to its deep penetration.
Q.4 What is the number of coats of stain to be applied?
A: One coat should be adequate in the case of a new deck and this is what most manufacturers recommend. Excessive application of stain may result in peeling or sticking surfaces.
Q.5 What happens when it rains and I have stained my deck?
A: The window upon no rain following the application of the stain is important (24-48 hours). In case it rains then you might have to clean up again and re-stain where it has been spoilt too when it is quite dry.